WHY?
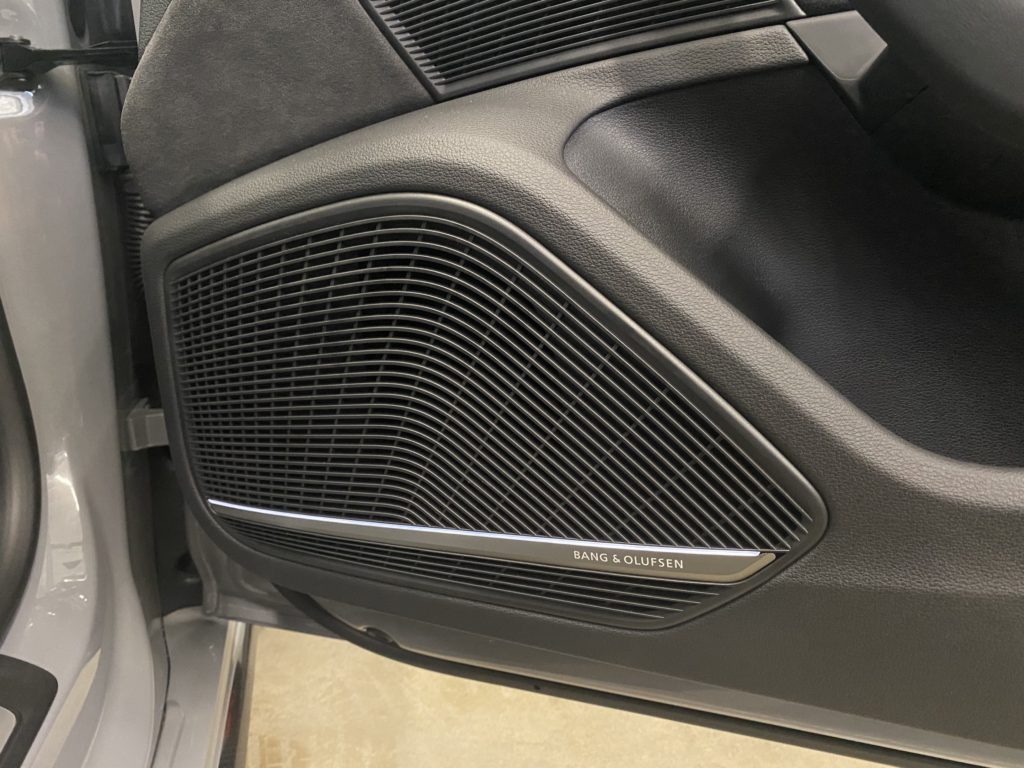
This customer contacted us after purchasing his new vehicle, because the factory Bang & Olufsen in his Audi RS5 was lacking impactful, low-end bass. We had previously worked on his Ford truck, in which we performed a larger upgrade; however, the Bang & Olufsen system in this Audi sounded great besides the lack of bass.
During the free phone consultation, our System Designer, Don, was able to suggest the products that would serve our customer and meet all their needs. This system was actually designed during the Colorado stay-at-home period, so coming into the shop for a traditional in-person consult was not an option.
WHAT?
Added a mono amplifier – We used the JL Audio XD600/1v2 to power the subwoofer in this setup. This is one of our go-to amplifiers for a few different reasons. The XD amps are ultra-compact, we can hide these amp anywhere. The XD amps also sound fantastic and they are extremely reliable. The current JL Audio XD/v2 amplifiers have been current models since 2014 because of their incredible reliability.
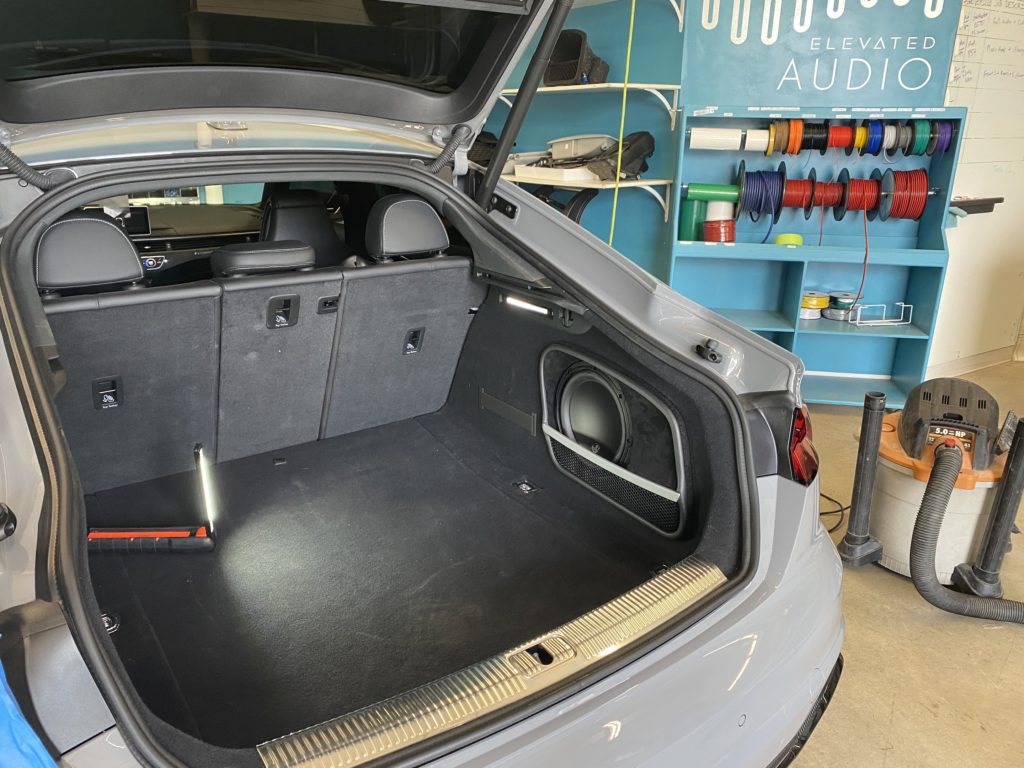
We were able to completely hide the amplifier in the driver side compartment of the trunk, where some of the factory modules were already located. Our technicians fabricated a custom amp rack to house the new JL Audio amplifier that you can see in the photos below. The amplifier looks completely OEM in this location, while also remaining easily serviceable. We were also able to hide our JL Audio line-output-convertor in this same cavity, which you can barely see in the photos below the amplifier.
We would typically install a bass knob, but since we were grabbing our audio signal from the factory subwoofer, we were able to use the sub level adjustment in from the factory head unit to independently adjust the level of the new subwoofer. It’s important to note that this option is only recommended if the factory head unit has a bass adjustment, as well as a separate subwoofer adjustment.
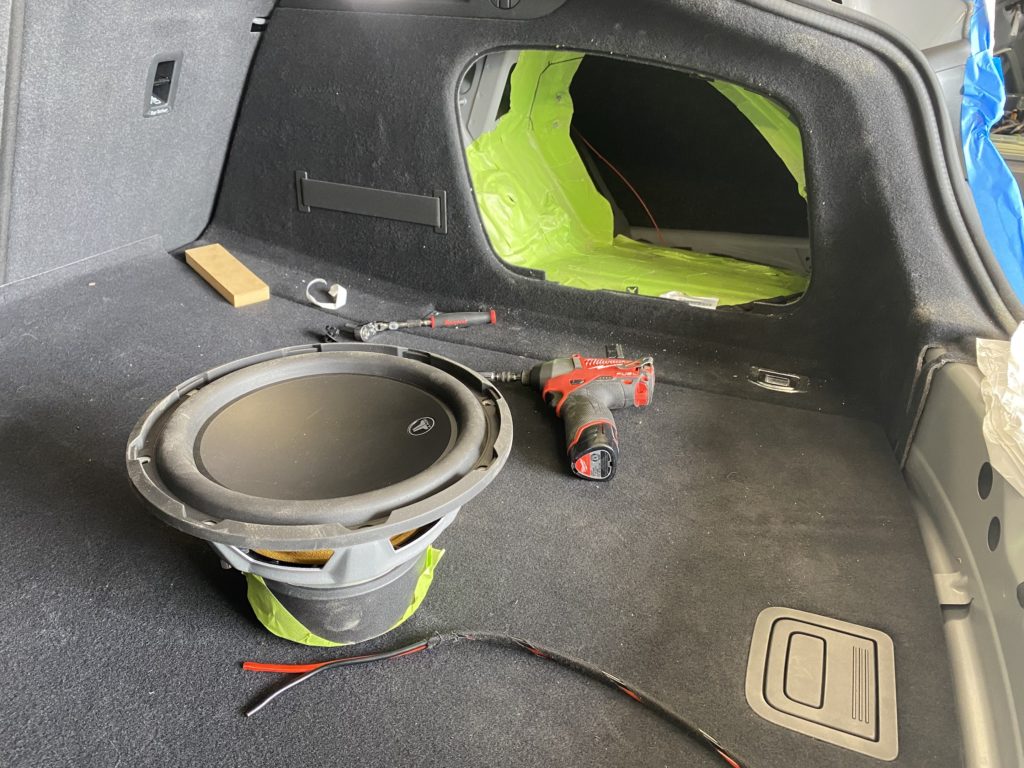
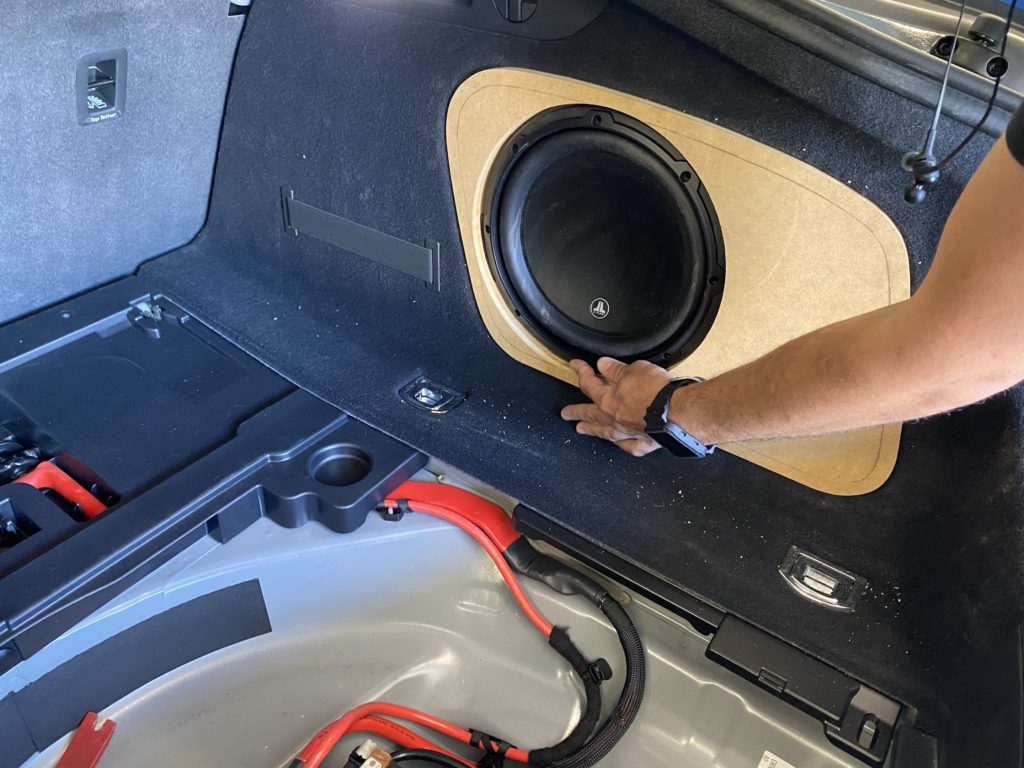
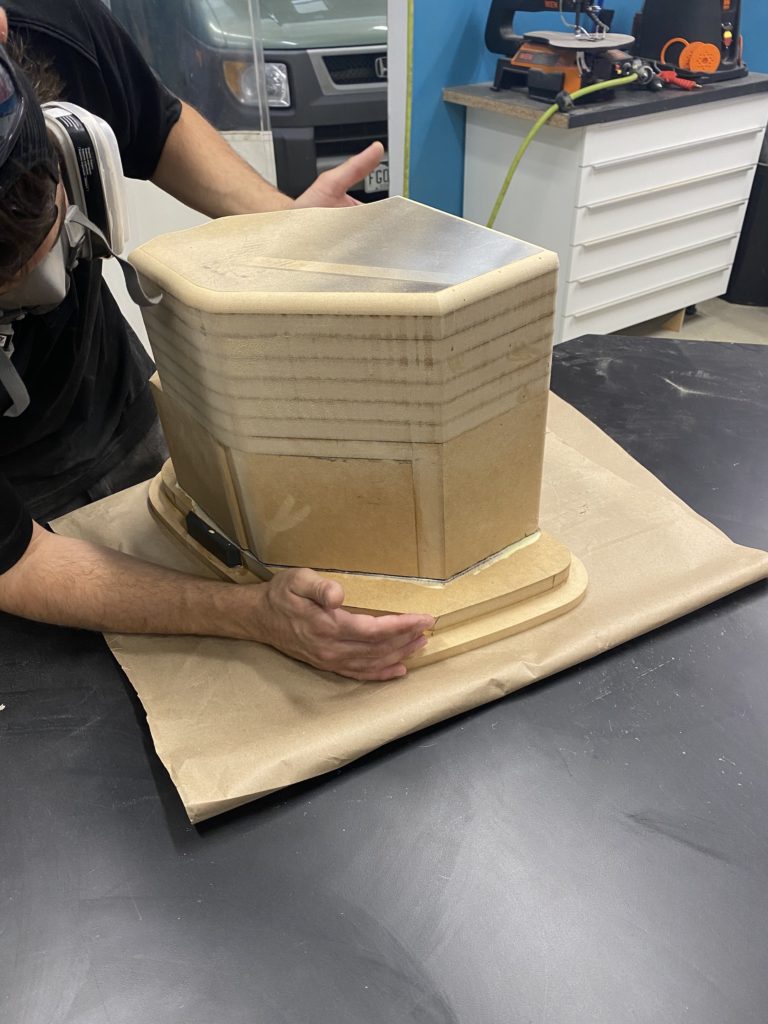
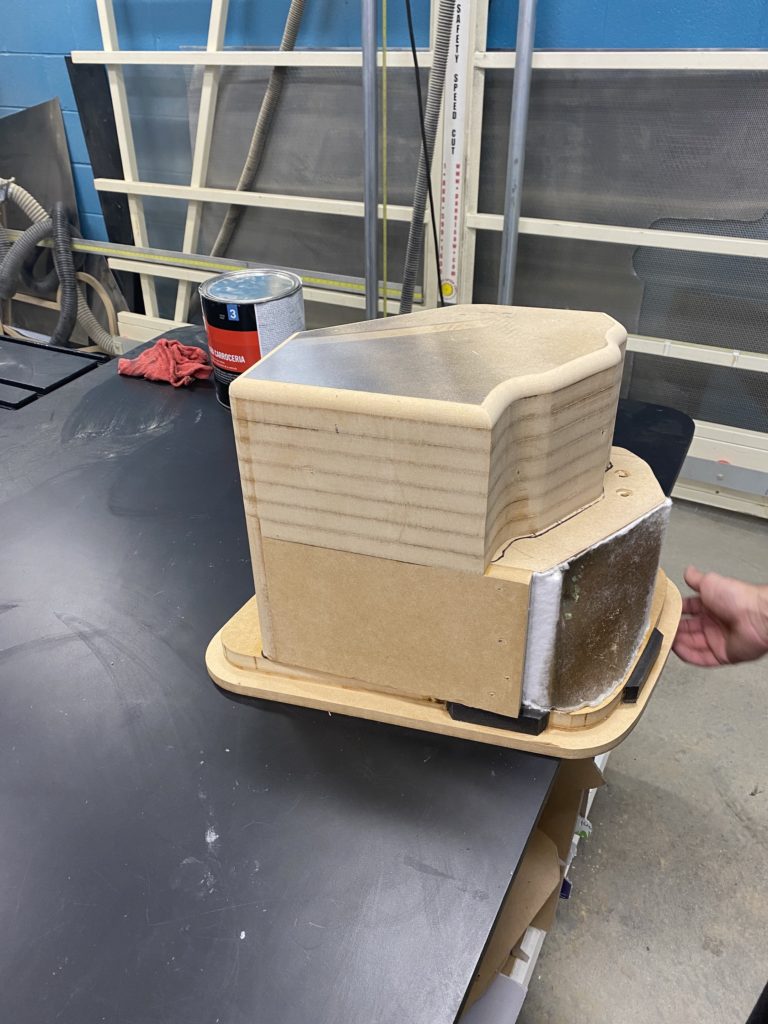
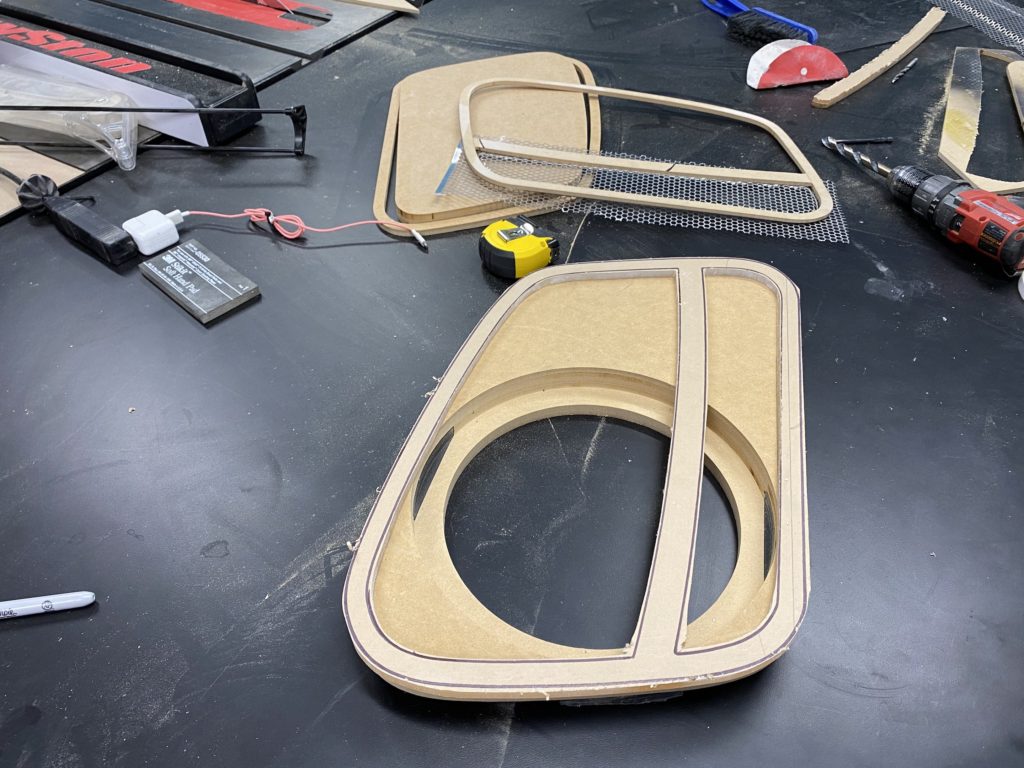
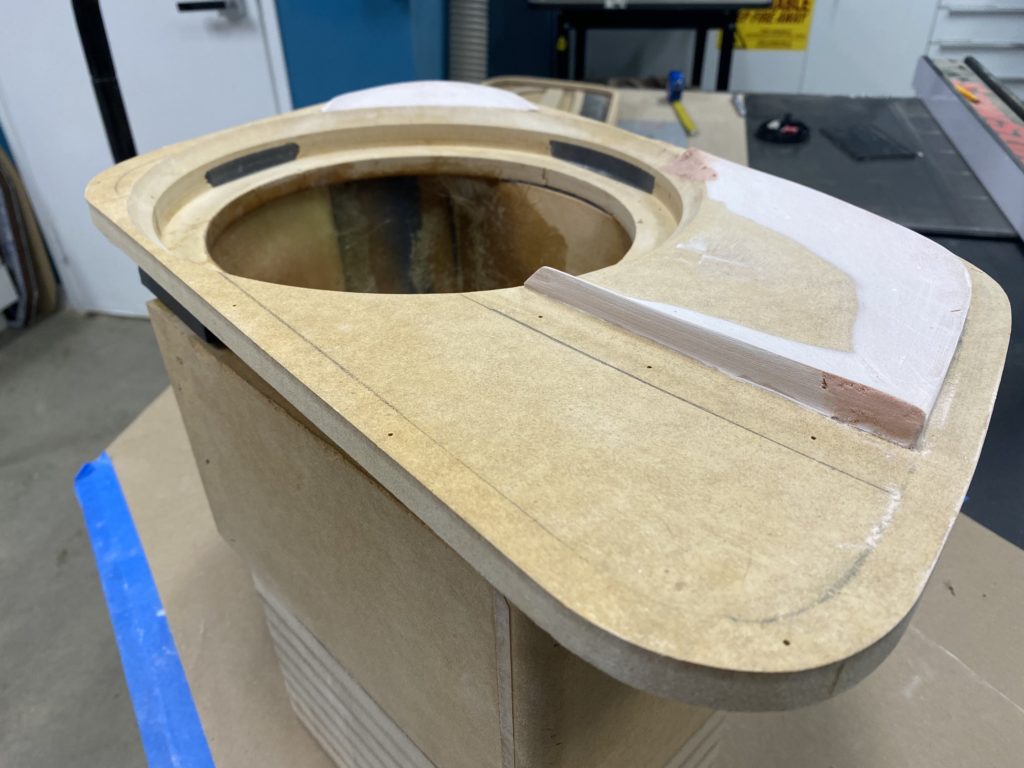
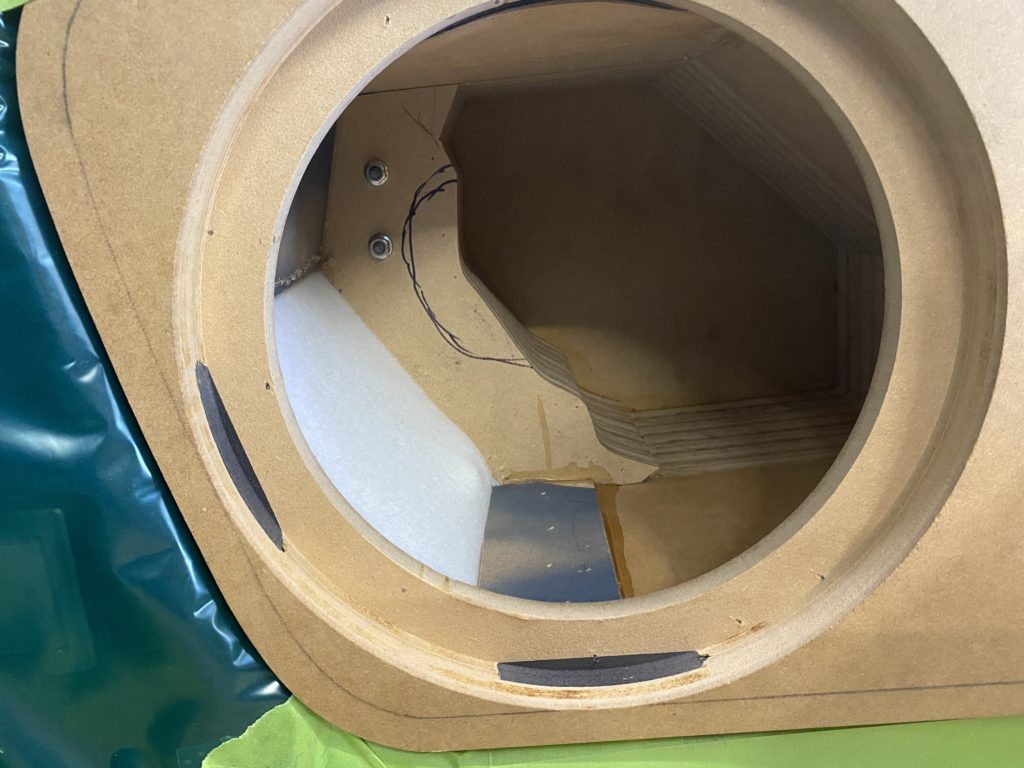
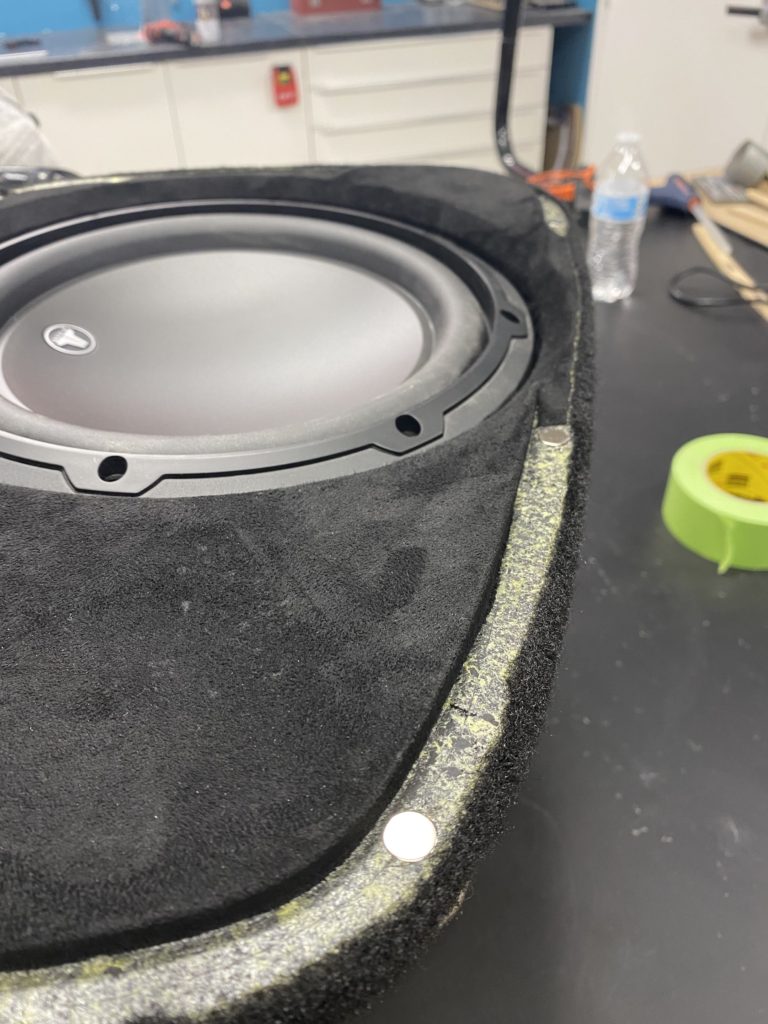
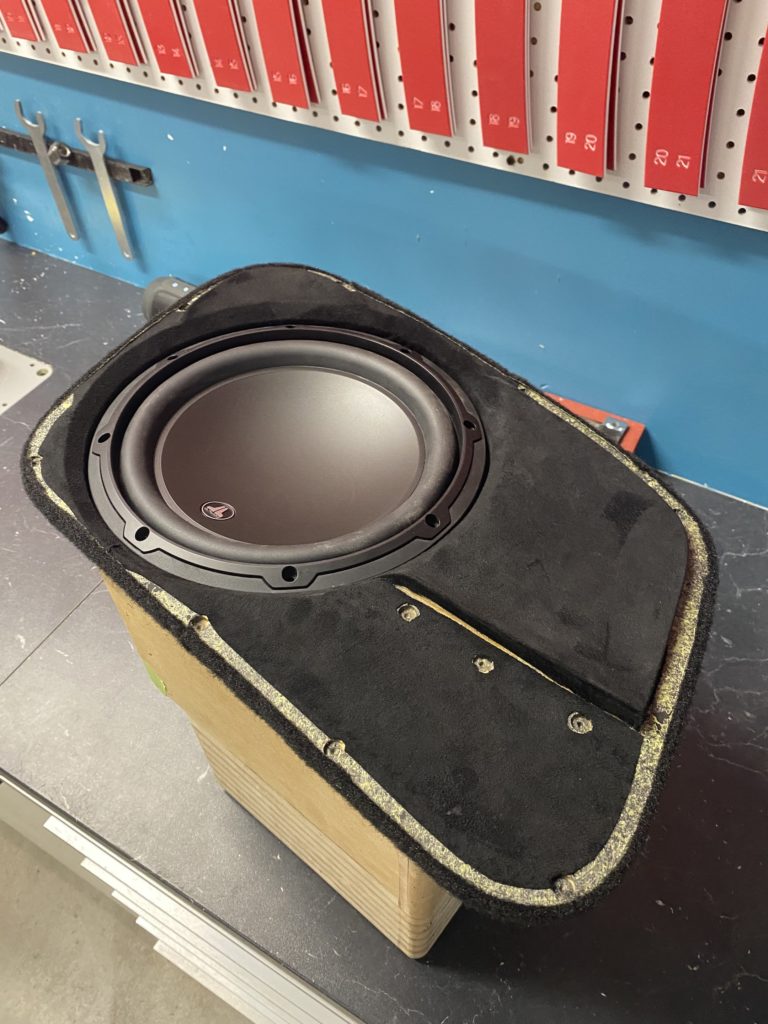
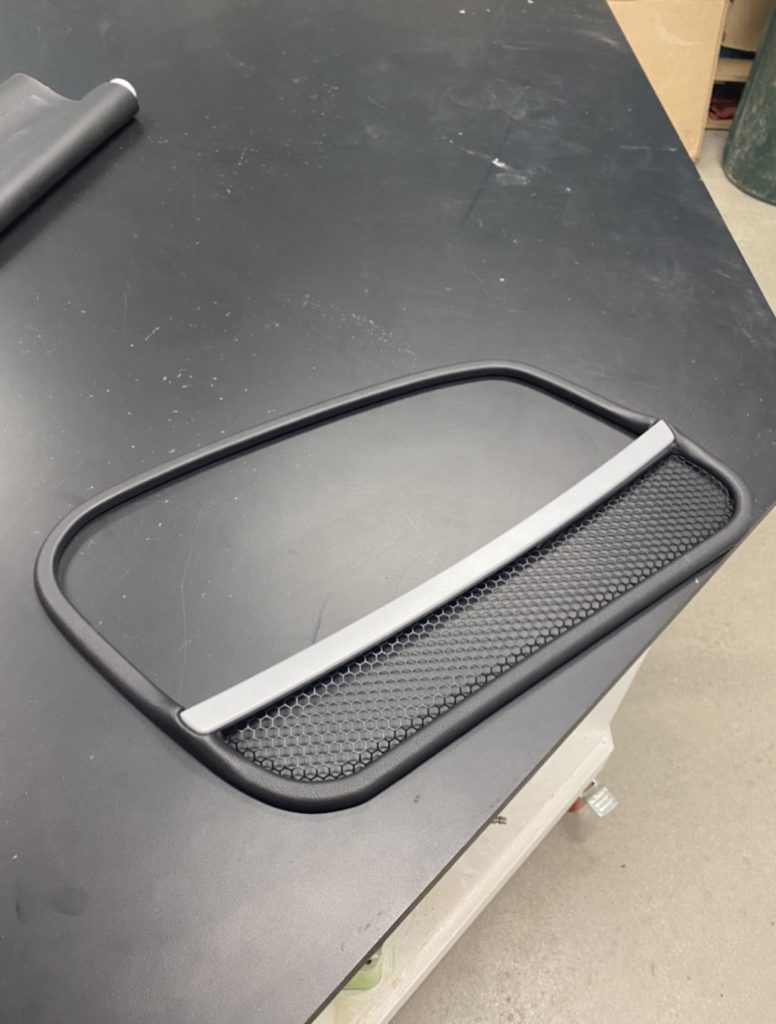
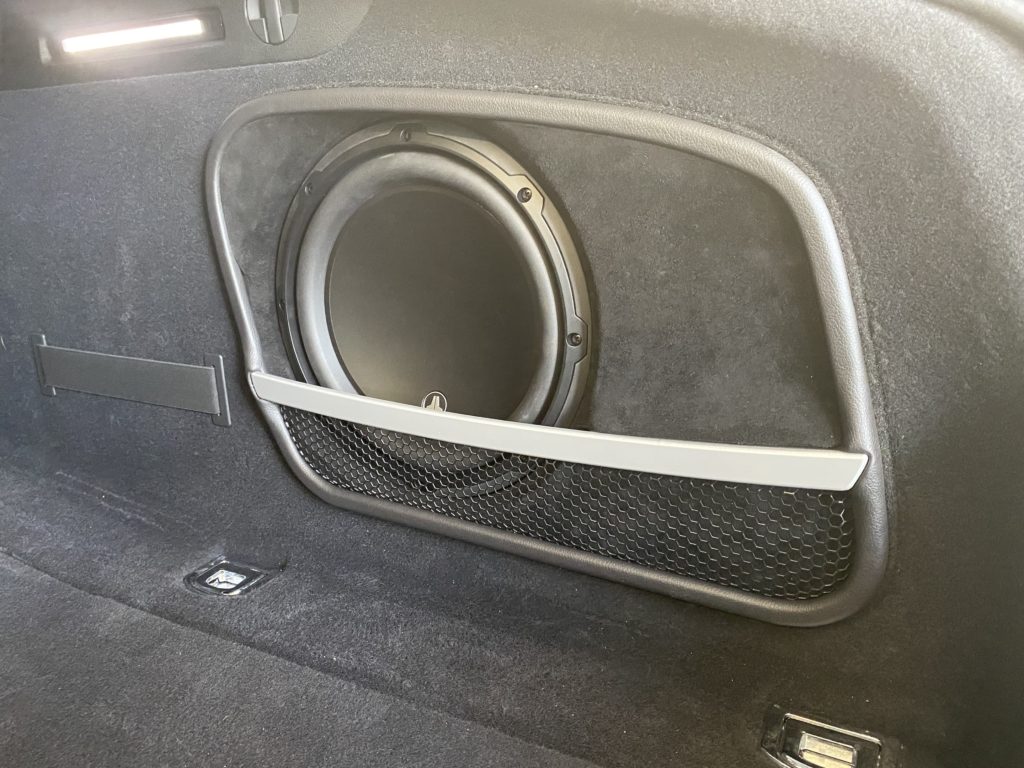
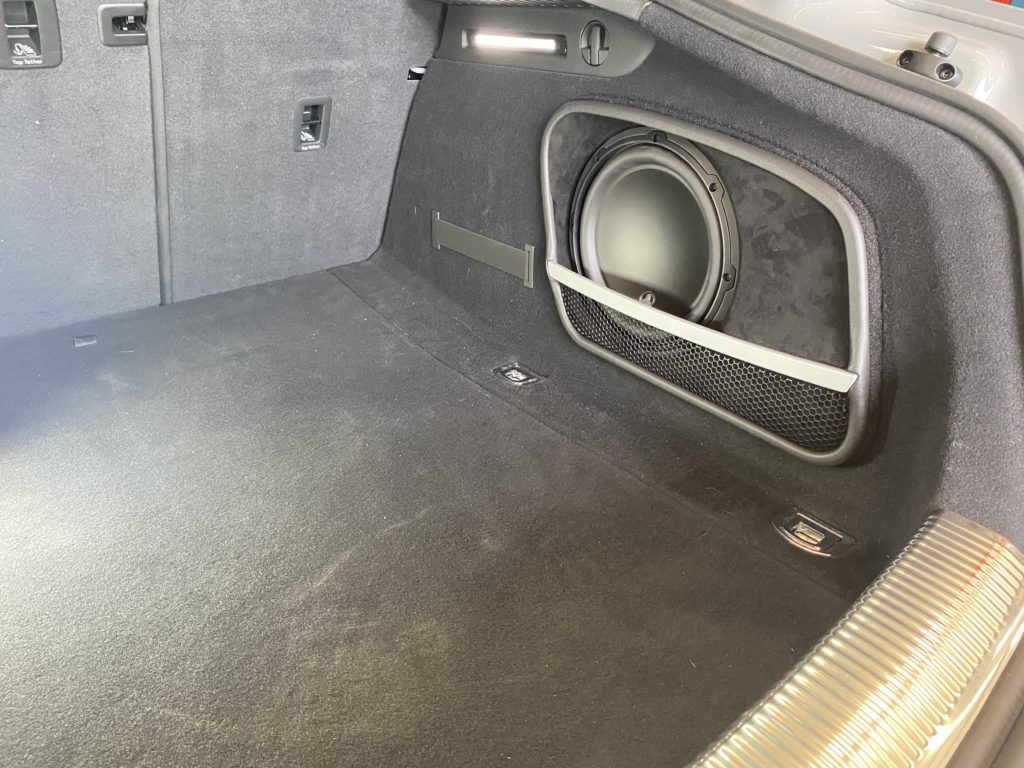
Fabricated a custom subwoofer enclosure with OEM Audi styling cues – It was key to design an enclosure for this RS5 that flowed well with the rest of the vehicle. Anytime we add something to a vehicle, it needs to appear as if it belongs there. We chose the JL Audio 10W3 for this setup because we knew it would properly fit in the space provided and sound incredible paired with the factory B&O system.
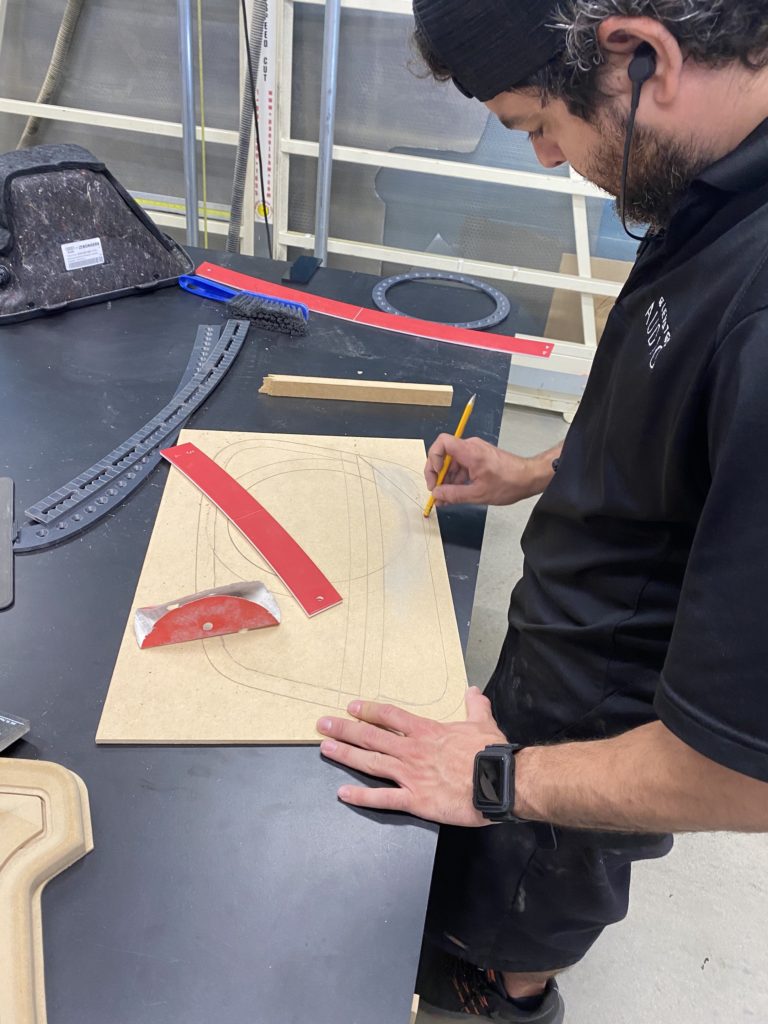
Our fabricator spent a some time scanning the vehicle for inspiration, looking for factory styling cues that he could incorporate into the custom enclosure. He decided to mimic the OEM speaker grills on the front doors, because the shape worked very well with the new enclosure.
Below you can see some of the styling cues we stole from the OEM Audi grill.
-
- The OEM Audi Grill
-

- Our Custom Enclosure
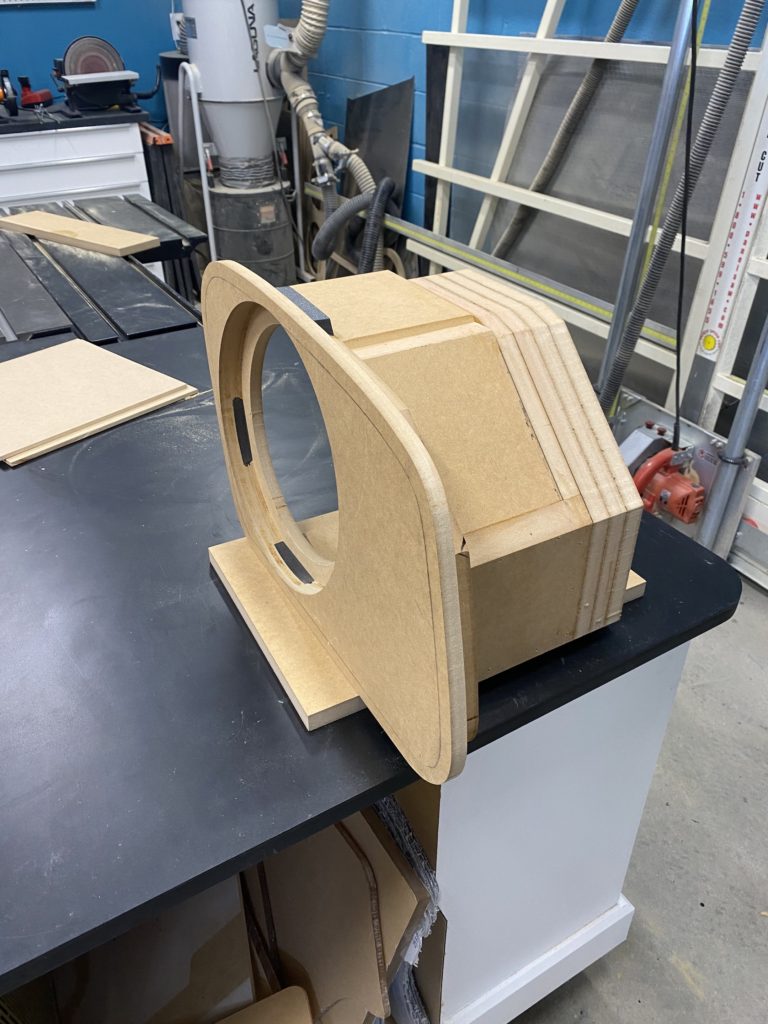
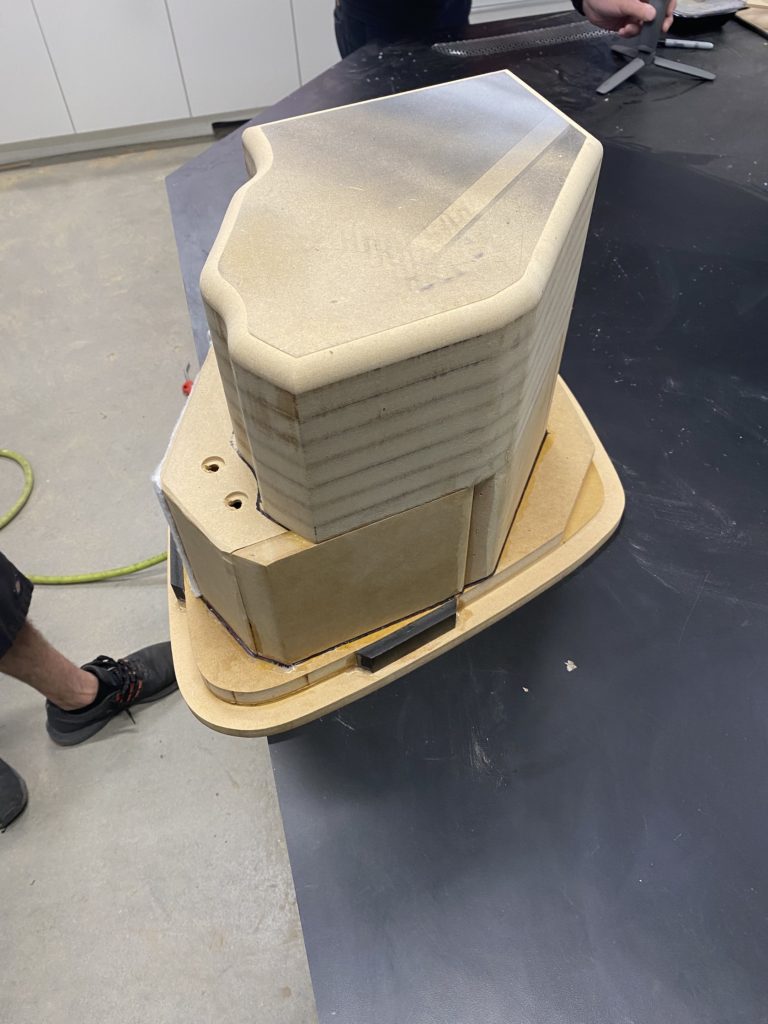
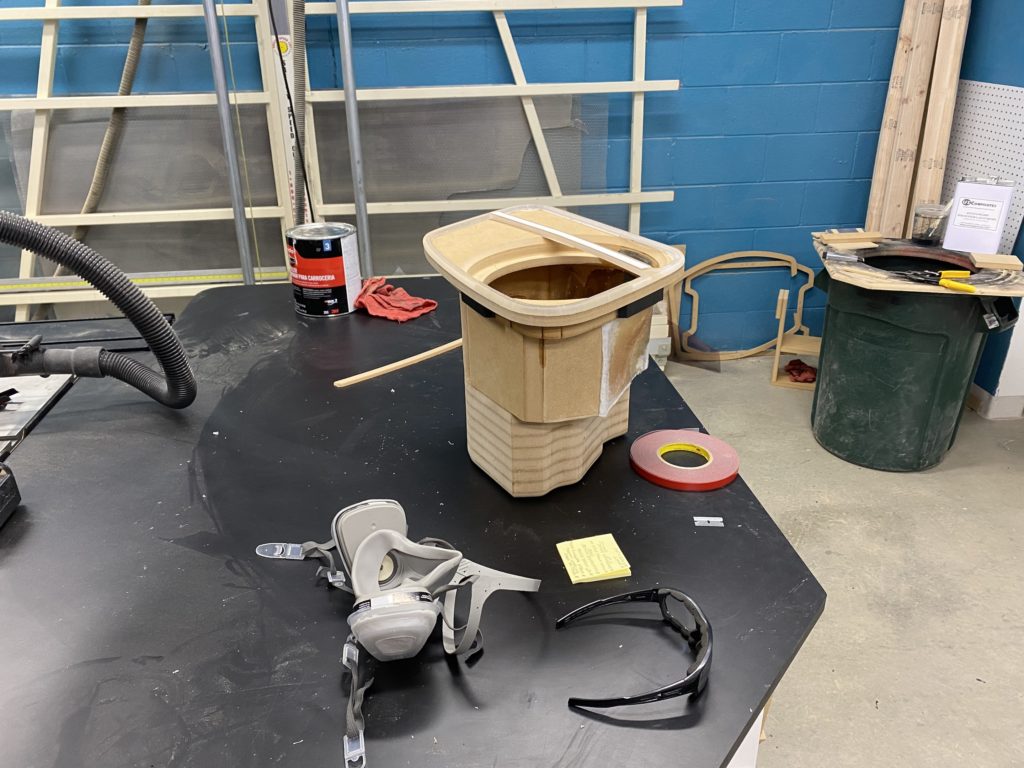
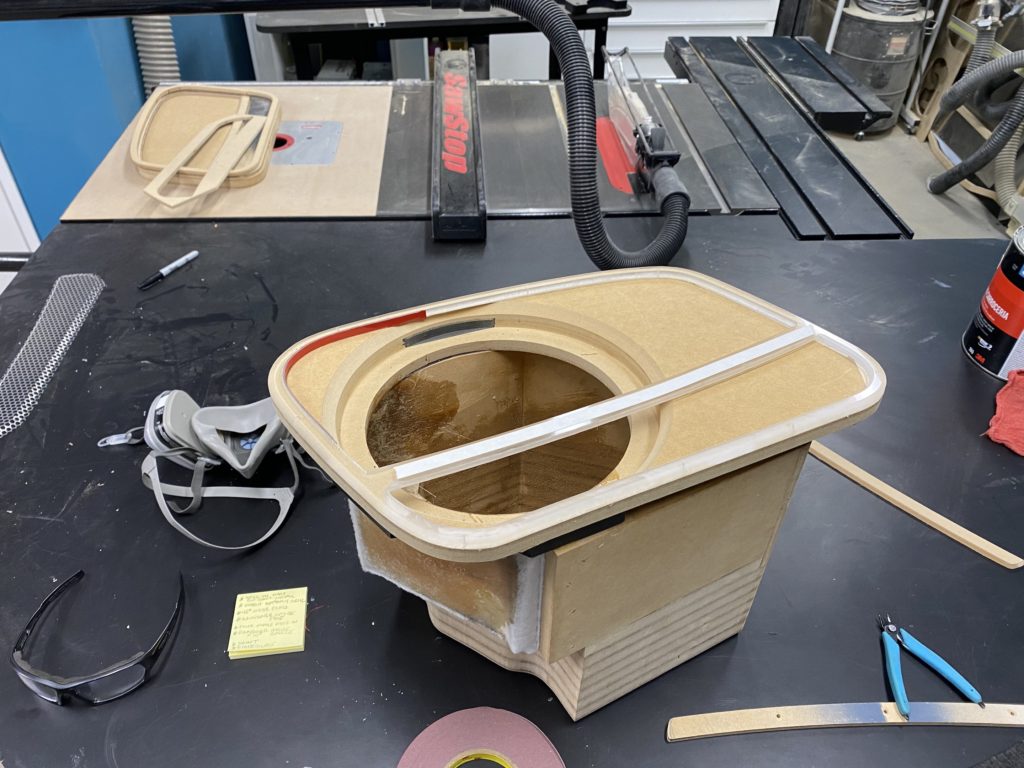
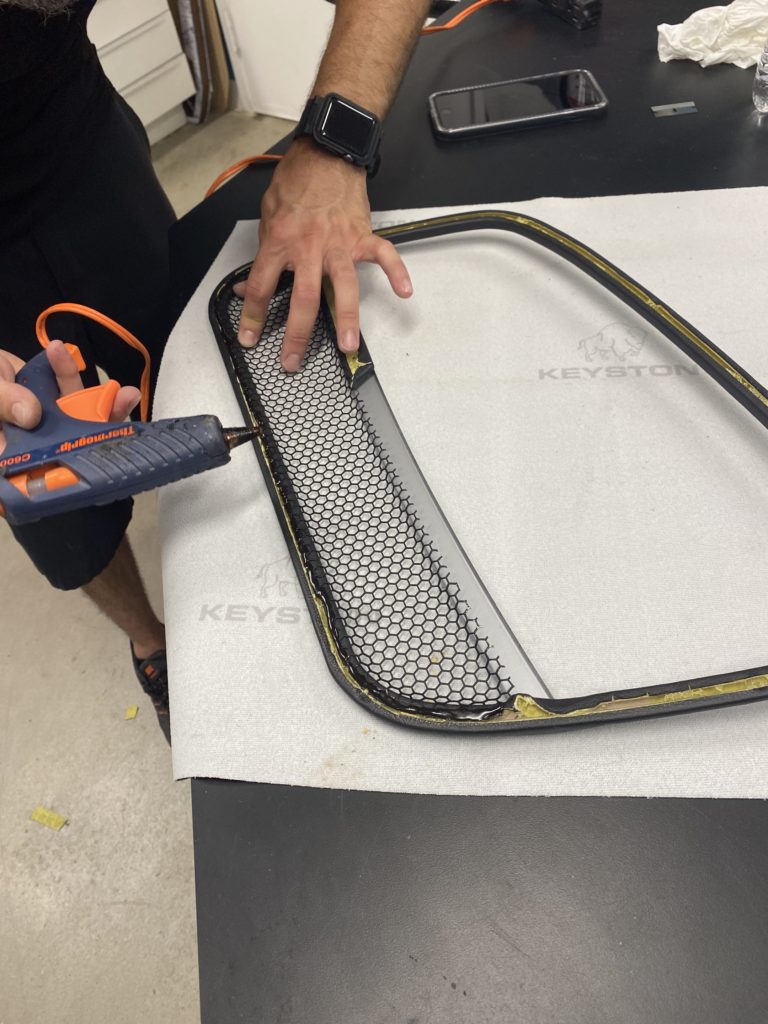
Going into the project, we were planning on using fiberglass to create the mold for the enclosure; however, we were able to use stack-fabrication techniques for a majority of the enclosure and we only needed fiberglass for a small side of the enclosure. You can see in the photos how many different angles went into building this enclosure, in order to provide the JL Audio 10W3 proper airspace.
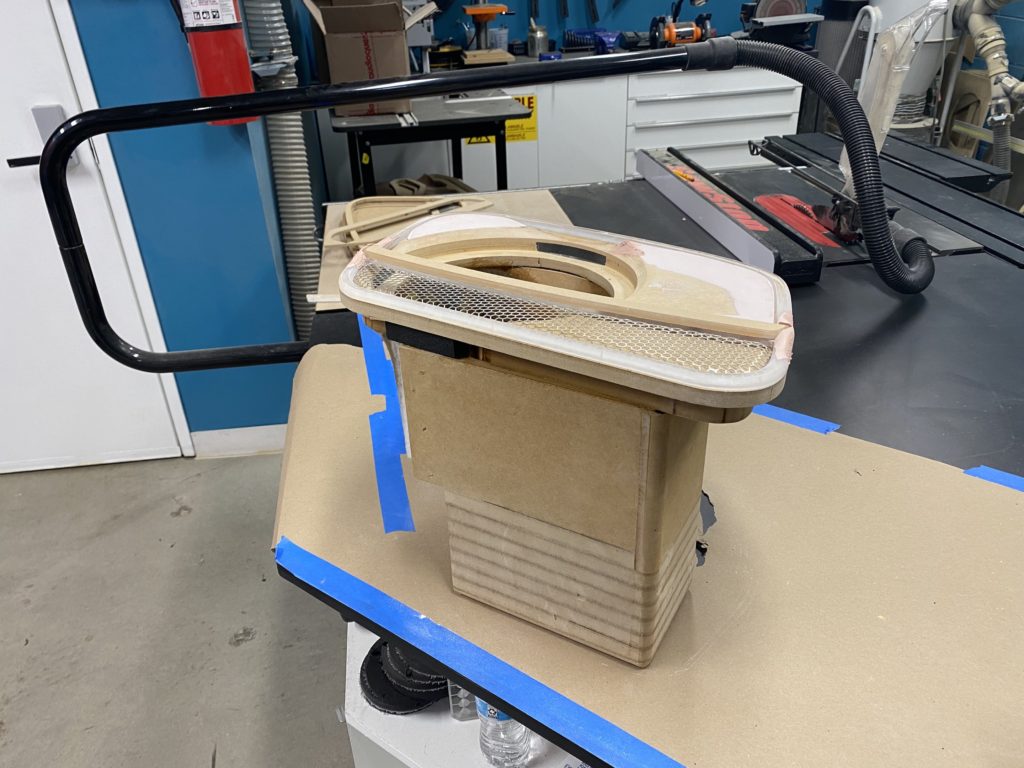
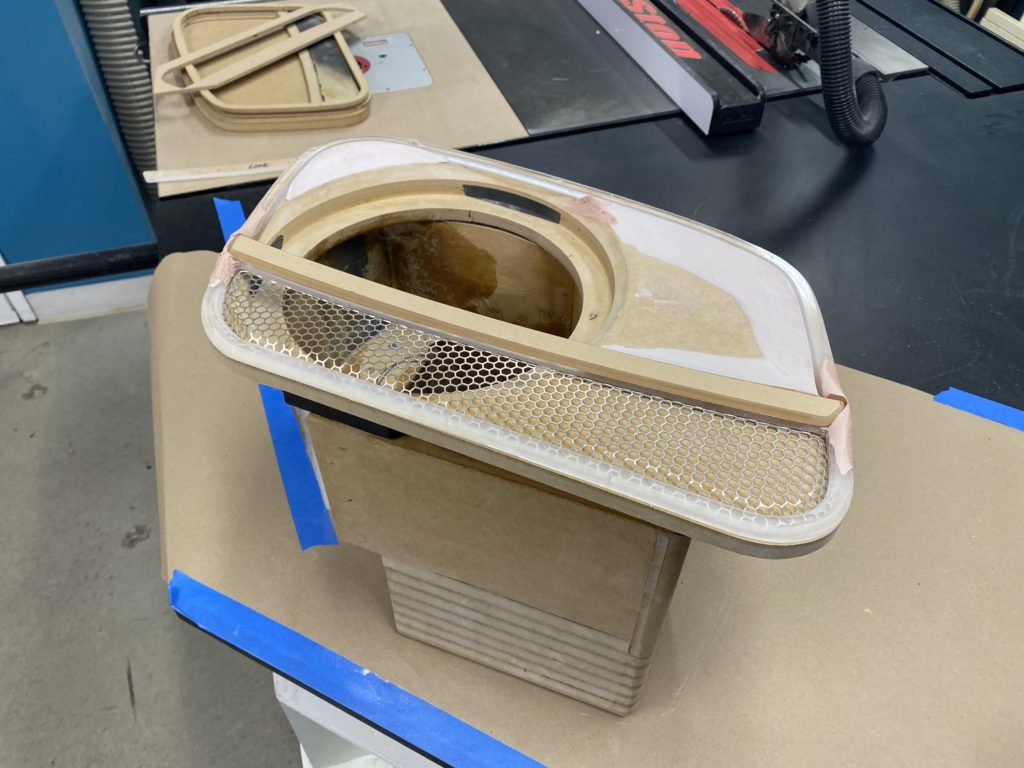
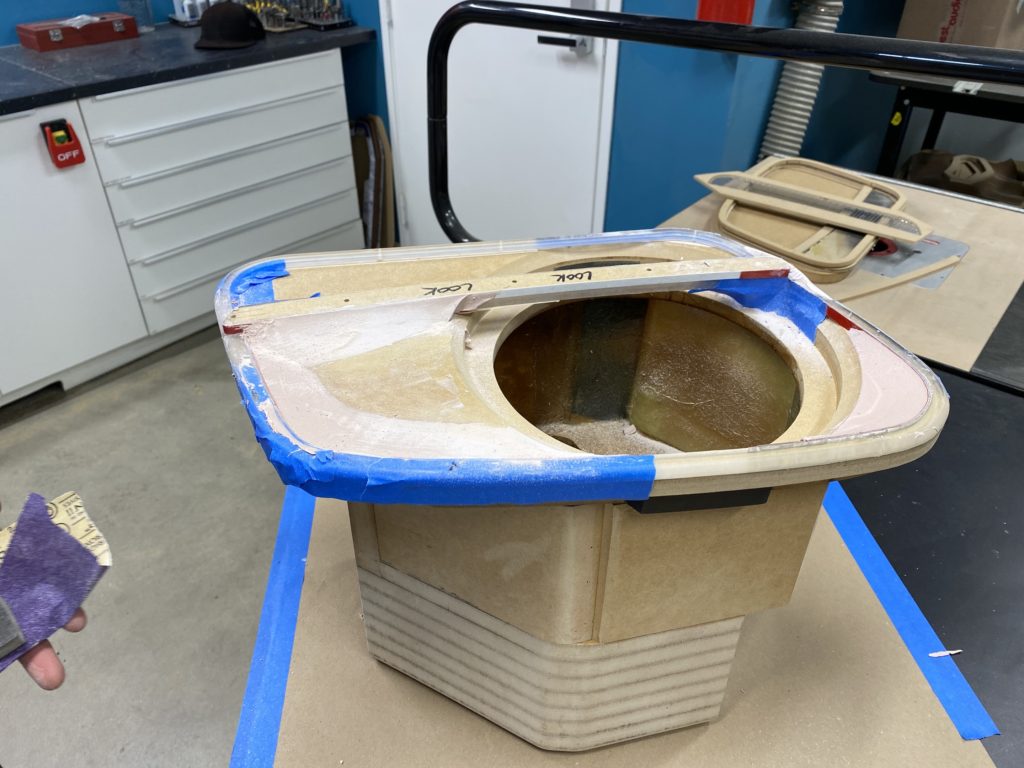
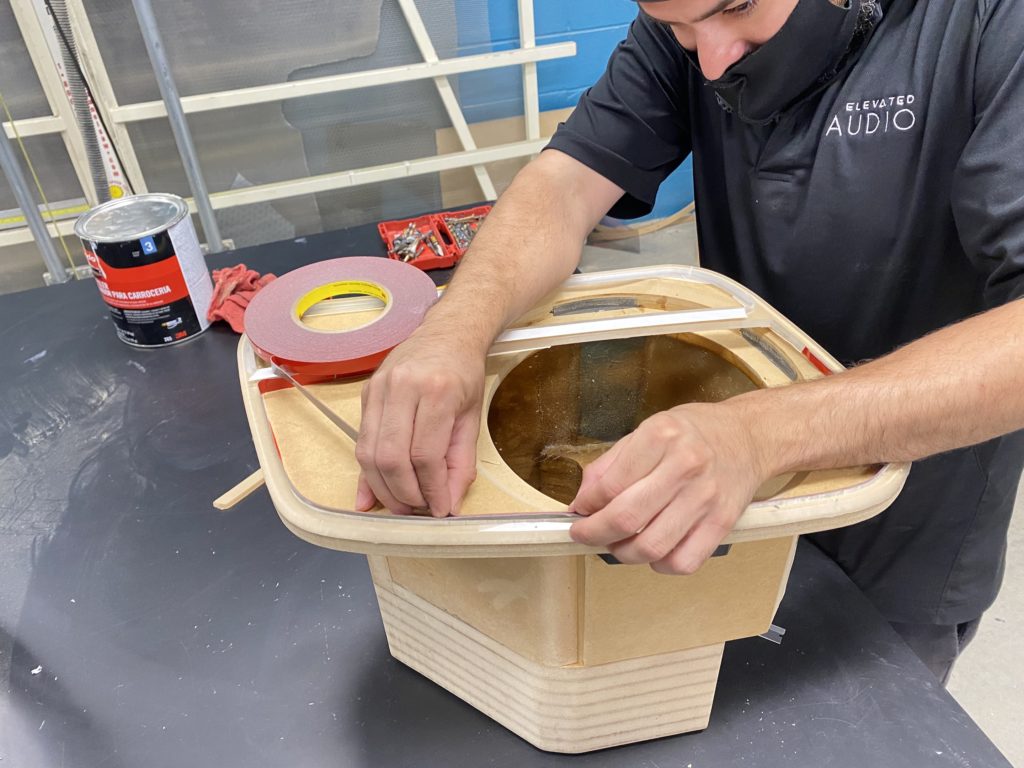
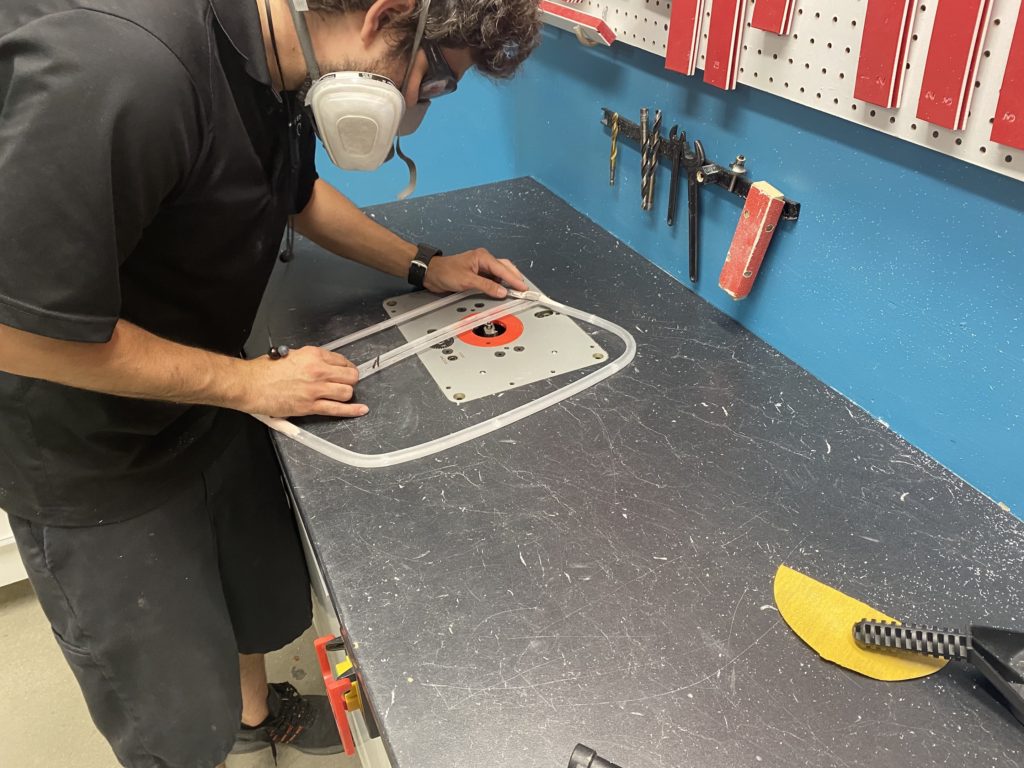
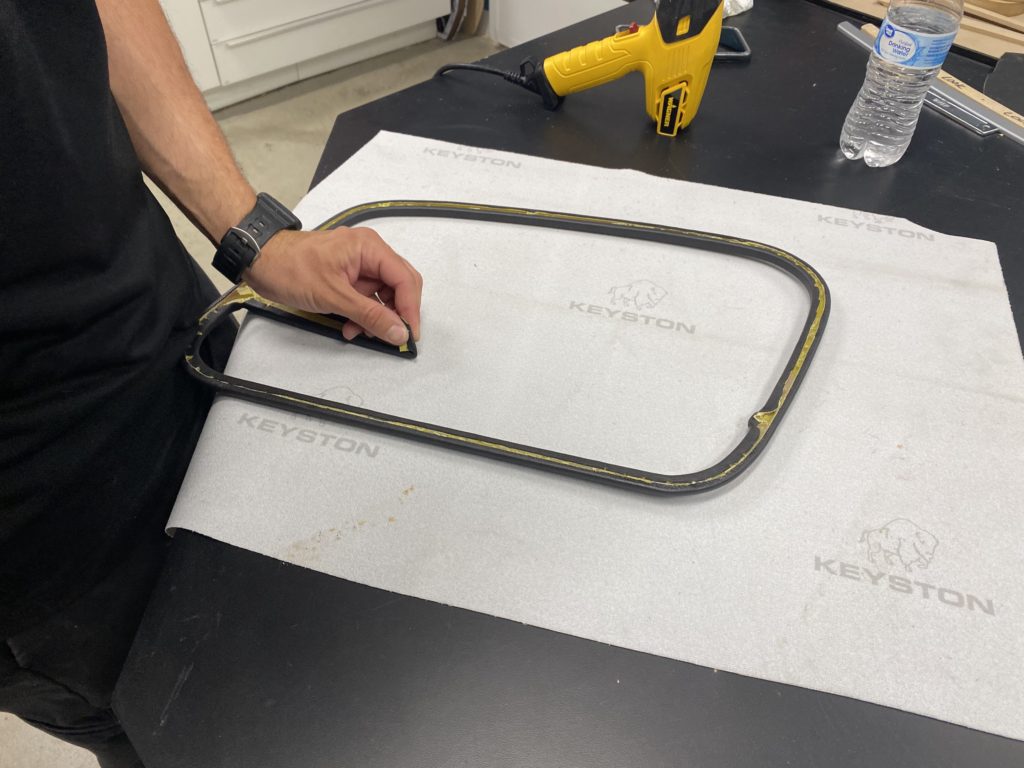
The trim piece and the grill for the enclosure was fabricated as a separate piece so that the subwoofer could easily be serviced if ever needed. We used clear acrylic to may the shape for the outer trim piece, as well as the styling piece across the subwoofer.
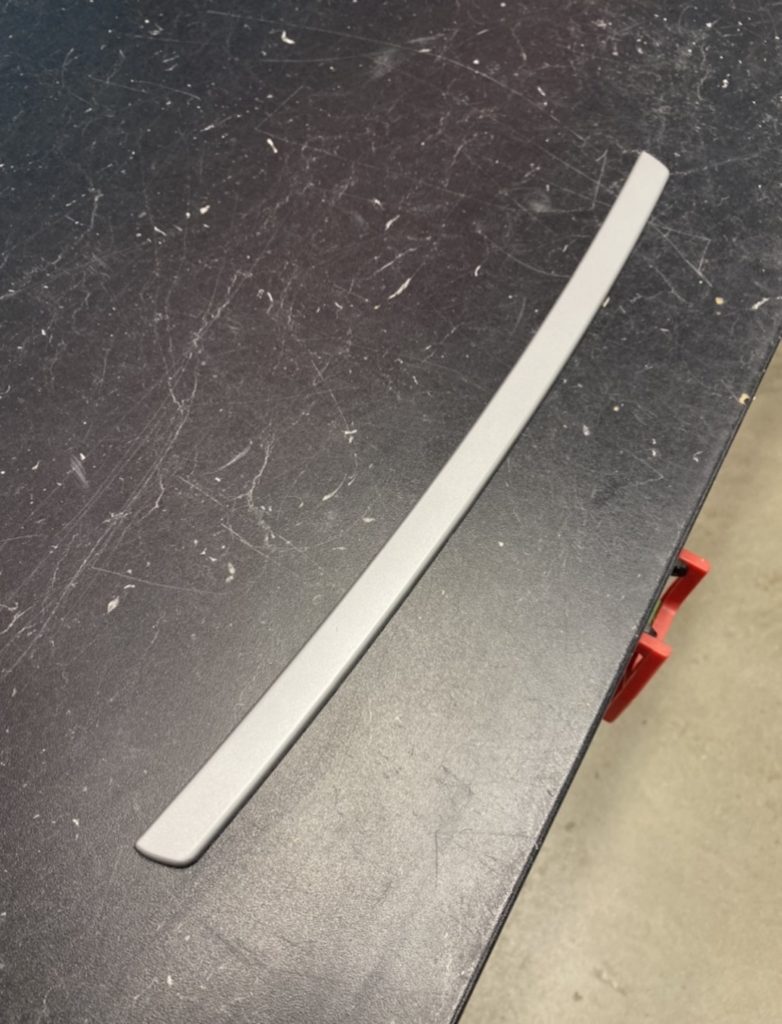
The front of the enclosure was wrapped in a black suede, and the trim piece was wrapped in a black vinyl. The bar across the subwoofer was painted silver to match the factory Audi grill, and we chose a grill material with shapes that best matched the shapes in the factory exterior grills. Once again in the name of serviceability, we chose to attach the trim piece to the enclosure using magnets. Magnets are awesome because you can hide them into your panels and enclosure, but also they come apart much easier than permanent mounting hardware. If the application makes sense, we love using magnets!
HOW?
Elevated Audio is known first and foremost for our customer’s overall experience from beginning to end. Winning the North American 2018-2019 Customer Choice Award in the 12-volt industry-validated our commitment to provide trusted interactions between our store in Denver and our customers. We are also lucky to have a Top 5o 12-volt technician in overseeing and performing all installations.
Here’s how we performed the installation.
WIRING
The signal was found at the factory Bang & Olufsen amplifier. We did not replace the radio in this vehicle because it does not make any sense to do so, it already has all functionality an aftermarket unit would have. The factory head unit also had independent sub level adjustment, which allowed us to use that for the new JL Audio sub.
Power is supplied to the amplifiers utilizing our four gauge pure copper wiring. Never use copper clad aluminum (CCA) if you want the best current flow!
MOUNTING AMPLIFIERS
At Elevated Audio, we build amplifier plates that mount to factory bolts on the chassis, and we attach our amplifiers to those plates. We fabricated an amp rack for this RS5 that housed the JL Audio amplifier, as well as a factory module, and by doing this we were able to use the existing factory mounting points for that existing module. As you can see in the photos, the amp appears almost as if it belongs there from the factory.
All interior wiring is wrapped in Tesa tape for a factory look and feel, and all exterior wiring is shielded in Tech Flex shielding. The wiring routes in factory channels throughout the vehicle and is not merely “tucked” under panels, which always find a way to wiggle out after a few months. It’s our goal to make it hard to differentiate factory wiring from aftermarket. Luckily, most of the wiring was done in the cavity of the trunk, where the OEM amplifier is located.
CALIBRATING THE AMPLIFIERS
Amplifiers are useless unless set up correctly. Elevated Audio always sets the gains of our amplifiers by using an oscilloscope. This tool allows us to read the clipping point and set the amplifier to play up to that point but never beyond it, protecting the entire system and your ears!
SUBWOOFERS
We used a JL Audio 10” W3 subwoofer, which was the perfect bass addition to the factory system. Since the RS5 is a hatch style trunk, none of the bass gets trapped in the trunk.
SOUND DEADENING
While you’re performing any upgrade to your sound, it is crucial to slow down the transfer of energy throughout the back wall since we will be adding a substantial amount of bass. At Elevated Audio, we use Sound Shield premium sound deadening to achieve both results. We used 6 square-feet of Sound Shield on the area around the enclosure to prevent rattles. This vehicle is already very well built, so not much sound dampening was needed to eliminate any possible rattles the new sub could cause.
THE RESULT!
It’s always especially satisfying to work on a second vehicle for a client, it means that we properly delivered on the first vehicle. This project turned out perfect and we exceeded our client’s expectations, which is always what we are shooting for. The bass addition complimented the Audi B&O audio system perfectly.
Please contact us for your own Audi system design consultation because, while this is an fantastic setup, it may not be what you need. We tailor each build to our customer’s needs and expectations, so we must build something special just for you.
Music. It’s What Moves Us.
-Elevated Audio