
Links to all Products Used:
1. JL Audio VX700/5i
2. BLAM Under seat subwoofer (non-amplified)
3. 4-Gauge Amplifier Wiring Kit (Pure Copper)
4. DRC-205 DSP/Bass Control Knob
5. Front speakers (Factory)
6. Rear Speakers (Factory)
7. Sound Deadening- 2 Rolls SoundShield
WHY?
This customer came to us with his 2019 Subaru Crosstrek wanting to improve the audio in his vehicle, without sacrificing ANY space. His Subaru came with the standard factory audio system, which leaves a lot to be desired.
During the free ono-on-one consultation, we were able to recommend different options, including options that take up space. Sometimes a customer’s idea of a subwoofer is a giant box in the cargo area; however, we have ways of adding clean low-end bass without sacrificing much space at all. Ultimately, we want to deliver the best sound possible, but within the client’s parameters, and that’s exactly what we did on this project.
WHAT?
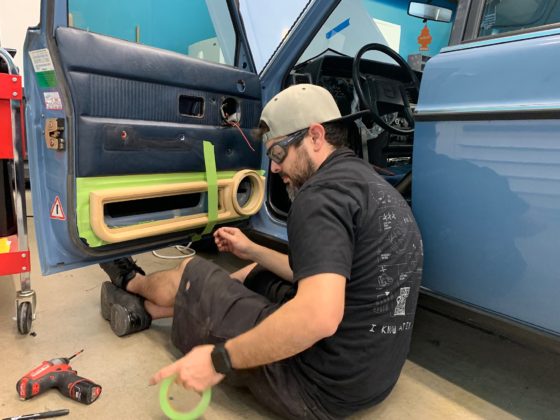
Sound dampened the front doors – For phase 1 on this build, we are powering the factory speakers, but we still wanted to ensure that the front door woofers had a solid surface to play on. This simple upgrade will improve the mid-bass in the front doors, reduce rattles and vibrations in the front doors, as well as set up the customer for a future speaker upgrade. As an added benefit, the Sound Shield will also help reduce road noise inside the vehicle.
Added an amplifier with integrated DSP – The customer cared more about quality and clarity than he did about loud volume and heavy bass. We decided the best route to improve his audio experience was to add an amplifier with an integrated DSP (Digital Signal Processor) to power his existing factory speakers, as well as a new subwoofer we will be adding.
You may be asking yourself, “who in their right mind would add an amplifier with a DSP to factory speakers?” Ultimately it comes down to where is the customer’s budget going to be best spent to give them the best upgrade possible. We know definitively that adding an amplifier and DSP to factory speakers will sound better than simply just upgrading speakers. Obviously, the factory speakers need to be in good working condition, but by approaching the build this way, we’re able to give the customer the biggest leap in sound in phase 1 while also setting them up for easier future upgrade.
We are running front and rear speakers from the new JL Audio VXi amplifier, as well as the under-seat subwoofer. The layout is detailed below:
Channel Layout
1 and 2 – Front factory speakers
3 and 4 – Rear factory speakers
5 – Under-seat BLAM subwoofer
Add an under-seat passive subwoofer–
The main objective of this project was to upgrade the audio in the vehicle without sacrificing any cargo space in the vehicle. A Subaru Crosstrek is a versatile vehicle, and in this scenario the customer really valued the utility that this vehicle offers.
We decided the MSP 25 passive subwoofer from Bonneville Labs would be a perfect solution to fit under the front passenger seat and fill-in the low-end bass in the system. The MSP 25 can handle 125 watts of RMS power, and it can play down to 50 Hz. Again, the goal was not window-shaking bass in the build, we were using the under-seat sub to fill-in the low-end bass and alleviate the door woofers from having to play too low.
HOW?
Elevated Audio is known first and foremost for our customer’s overall experience from beginning to end. Winning the North American 2018-2019 Customer Choice Award in the 12-volt industry-validated our commitment to provide trusted interactions between our store in Denver and our customers.
Here’s how we performed the installation.
WIRING
The signal was found at the factory radio. We did not replace the radio in this vehicle because it does not make any sense to do so! It already has all functionality an aftermarket unit would have. The radio is where we soldered in our connections for the signal to the amplifier.
Power is supplied to the amplifiers utilizing our four gauge pure copper wiring. Never use copper clad aluminum (CCA) if you want the best current flow!
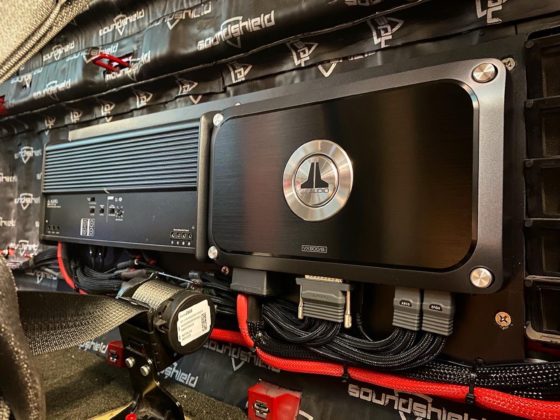
MOUNTING AMPLIFIERS
At Elevated Audio, we build amplifier plates that mount to factory bolts on the chassis, and we attach our amplifiers to those plates. This is to eliminate the need for running drywall screws through the floor of your brand-new vehicle. We mounted the JL Audio VX700/5i under the front driver seat and it fit like a glove!
All wiring is wrapped in Tesa tape for a factory look and feel. The wiring routes in factory channels throughout the vehicle and is not merely “tucked” under panels, which always find a way to wiggle out after a few months. It’s our goal to make it hard to differentiate factory wiring from aftermarket.
CALIBRATING THE AMPLIFIERS
Amplifiers are useless unless set up correctly. Elevated Audio always sets the gains of our amplifiers by using an oscilloscope. This tool allows us to read the clipping point and set the amplifier to play up to that point but never beyond it, protecting the entire system and your ears!
We also use the oscilloscope to determine the max safe volume from the factory head unit. Most factory head units do not output a clean signal all the way to the top of the volume scale, so it is very important to determine the clipping point of the factory signal to ensure we are not sending distortion into the system from the source.
DSP TUNING
Since the 5 Channel is a DSP amplifier and allows us to modify the whole audio experience, we set a microphone in the vehicle to capture the pre-tuned sound. We use this data to offset any peaks and valleys in the acoustic response to meet a particular response curve that our ears love. This creates music that sounds like the artist intended it to sound.
Another powerful tool in the DSP is the ability to time the sound. We measure the distance from each speaker to determine the firing order of the speakers. This process allows them to all hit your ears at the same exact time.
This process, along with level matching, allows a stage and image to be created on top of your dash, and this is just what we did in this Crosstrek. Now our customer can hear and imagine the artist and their band playing on top of his dash.
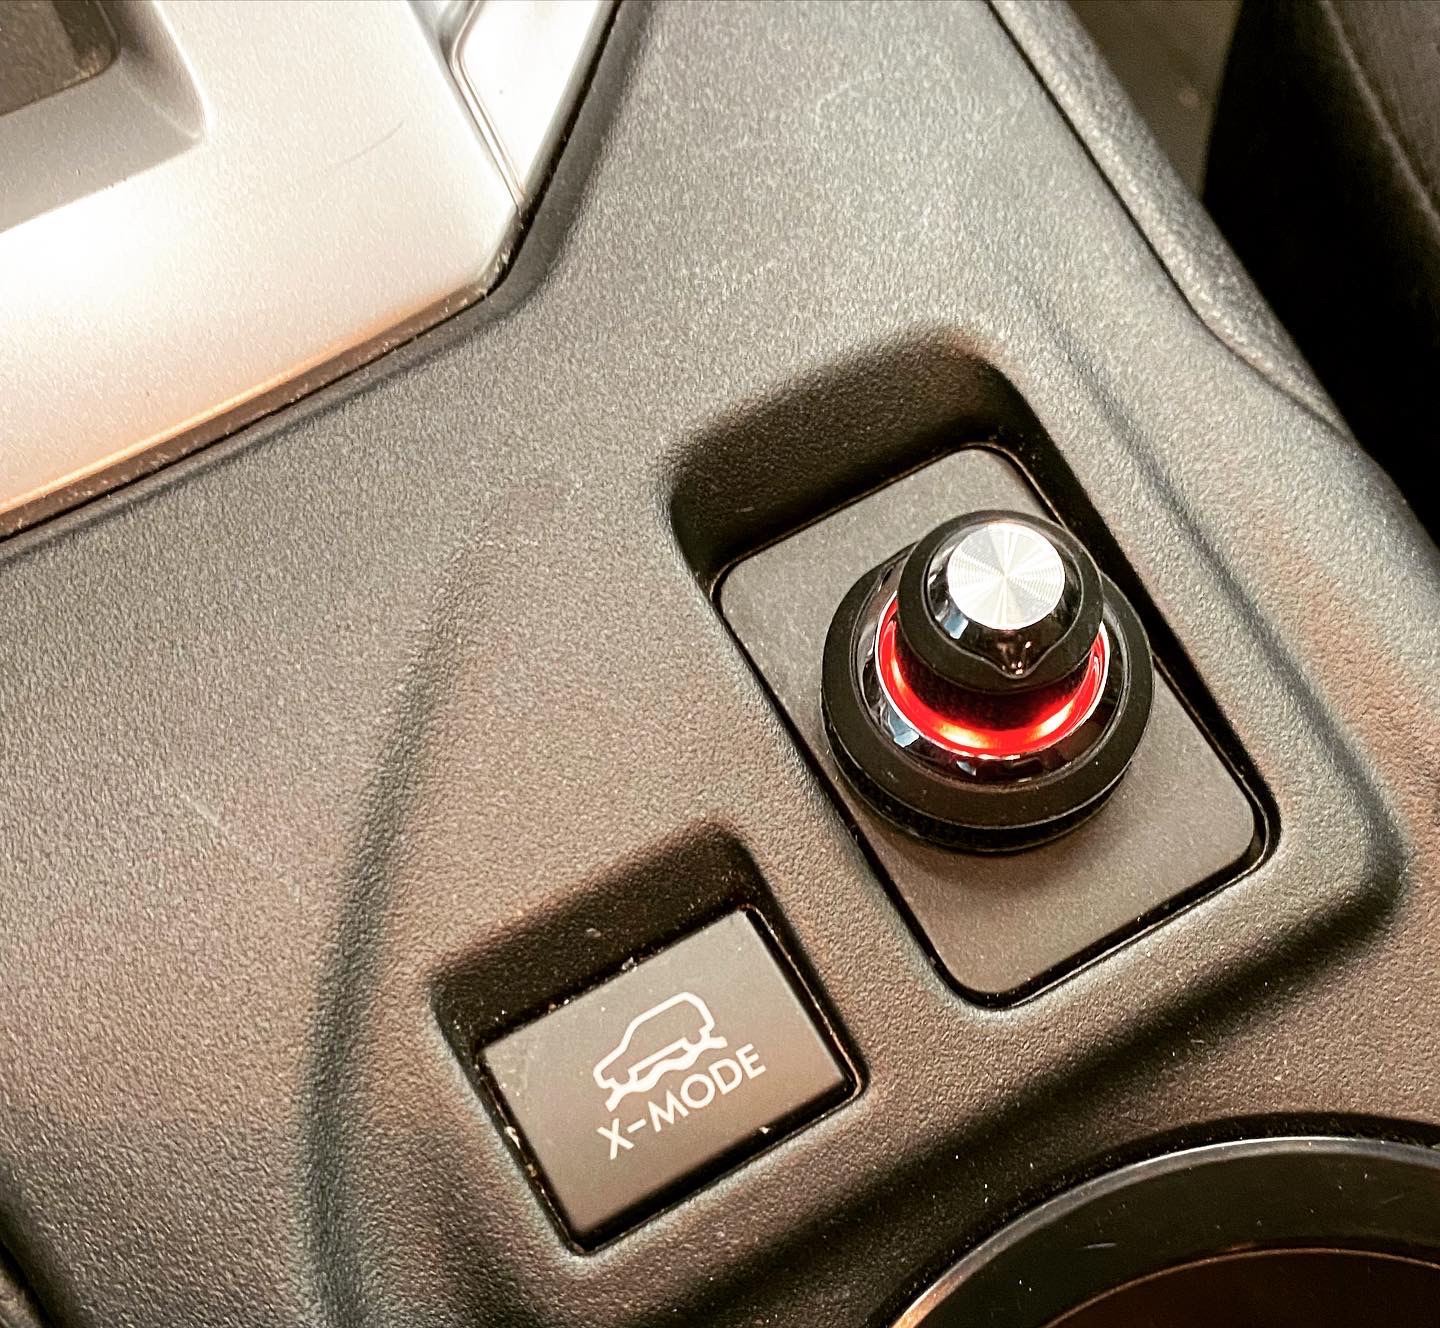
LEVEL CONTROLLER
The DRC-205 controller is flush-mounted into the center console area for easy access. The lights on this knob are programmable, which means the customer can choose their favorite color of illumination. The level controller acts as a “dimmer-switch” for your bass and allows you to incrementally adjust the subwoofer bass independently.
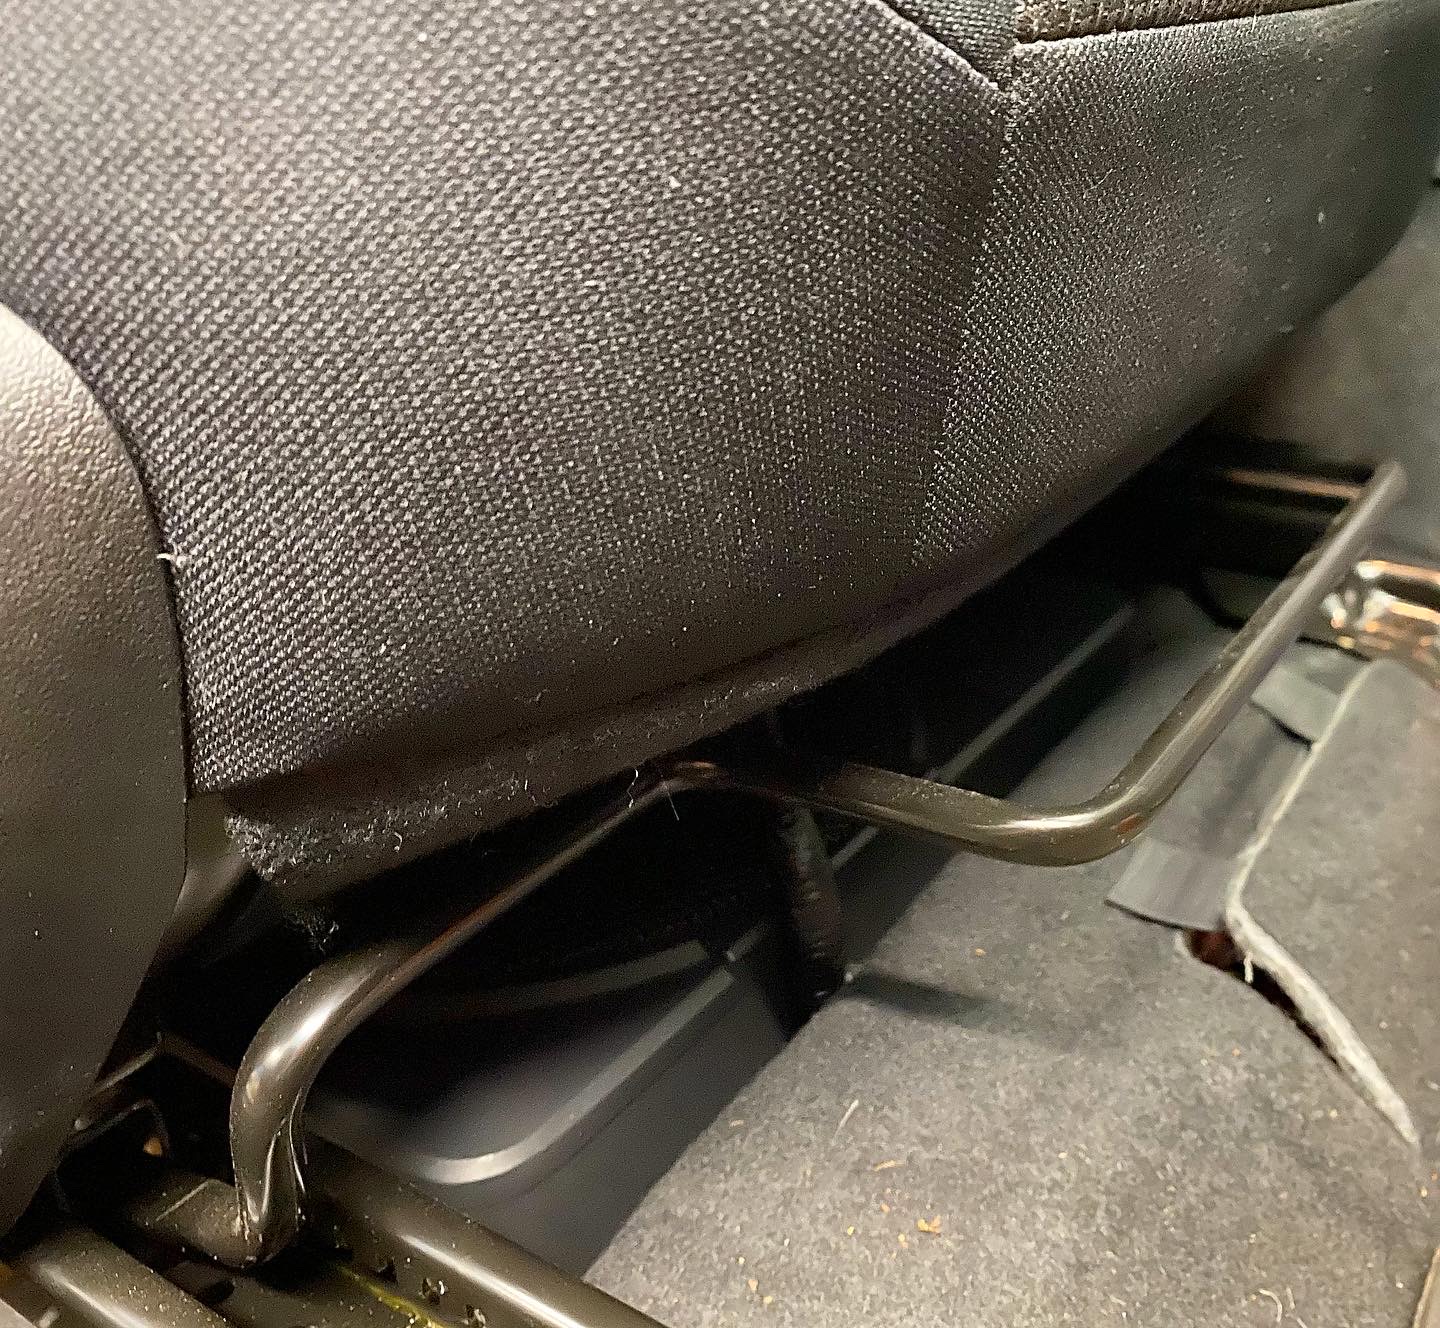
UNDER-SEAT PASSIVE SUBWOOFER
We were able to mount the MSP 25 passive subwoofer under the front passenger seat without the seat scraping or dragging on the subwoofer. We fabricated an ABS plastic mounting plate that was secured to the vehicle using stainless steel machined hardware. We then mounted the BLAM subwoofer to the ABS plate. This allows the subwoofer to be easily serviceable without affecting the integrity of the vehicle. This also allows the entire system to be easily removed from when the customer decides to sell or trade-in the vehicle.
SOUND DEADENING
While you’re performing any upgrade to your sound, it is crucial to slow down the transfer of energy throughout the door panel and to cut down the external road noise. At Elevated Audio, we use Sound Shield premium sound deadening to achieve both results. We applied full coverage to both of the front doors in this Crosstrek. (the photo shown below is only half coverage, it was taken during the sound treatment install)
THE RESULT!
We strive for a great experience in-house and after the sale. We are happy to know there is one more person on the road enjoying their morning commute!
Overall, this is a simple build that is not destructive to the vehicle in any way, and best of all, we did not take of any space in the vehicle with the audio upgrades! This whole system may be removed and reinstalled into our customer’s next vehicle ten years down the road.
Please contact us for your own Subaru system design consultation, because while this is a great setup, it may not be what you need. We tailor each build to our customer’s needs and expectations, so we must build something special just for you.
Music. It’s What Moves Us.
-Elevated Audio


could you guys do a line output converter install tutorial on the 2019 subaru crosstrek